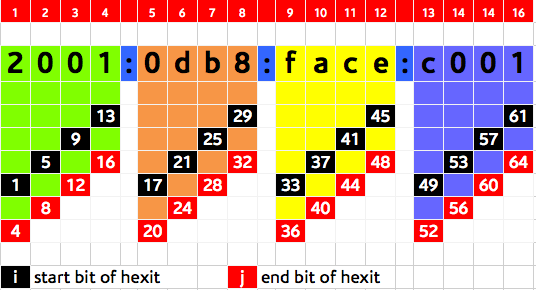
Introduction
Call it emotional attachment to IPv4 or whatever you like, but recently I have become more and more interested in finding and easy way to subnet IPv6 prefixes in my head like we are used to doing in IPv4. This post expands on an idea I picked off of the NANOG mailing list.
The method presented here is for the quick subnetting in your head, which you should get by practice. So it works well for a small number of subnets (16 max) but can be expanded for any number of subnets. However if you have to deal with more than 16 subnets, it is certainly more efficient to use any of the several IPv6 calculators out there (my favourite is sipcalc – a command line tool).
This method helps you answer the question: “Given the prefix PPPP/Y, what are the sub-prefixes of length /Z (where Z > Y) that can be gotten from it?“
I assume that you understand the fundamentals of IPv6 addressing, very basic binary and hex math. I also assume that you know how to arrive at the value Z from an analysis of your network design or requirements.
Definitions
- Hexit – a single hexadecimal digit (0 – 9 , a – e). A hexit is made up of 4 bits.
- Hex grouping – each of the groups of hexits of an IPv6 address that are separated by colons.
- Defining hexit – the hexits that change for each subnet but stays the same for the same subnet. Think ‘interesting octet’ from IPv4 subnetting days. You could simply look it up from the following table.
- Parent prefix – the original prefix to be subnetted in prefix/length format.
- Y = prefix length of original prefix
- Z = prefix length of subnets of original prefix
The Procedure
Calculate the following parameters
-
Number of subnetting bits: x = Z – Y
-
Number of subnets possible with x bits: S = 2^x
-
Number of hexits represented by the x bits: h = x/4 (this should be rounded up to the next integer)
For a given number of subnet bits (x), the defining hexit for each subnet will increase in value according to the increment, from hexadecimal zero (0) to “e” as shown in the table below. Note that the ‘definining’ hexit(s) is simply the one after the boundary hexit (that defined by original prefix length Y.
Examples
[a] Subnet 2001:db8::/32 into /36s
-
Subnetting bits (x) = 36 – 32 = 4 (these will give us 16 [i.e. 2^4] subnets.
-
Number of hexits represented by 4 bits = 4/4 = 1
-
From the table, the defining hexit should increment by 1 with discrete hex values 0 – f.
-
Thus our subnets are:
2001:db8:0000::/36
2001:db8:1000::/36
2001:db8:2000::/36
2001:db8:3000::/36
2001:db8:4000::/36
2001:db8:5000::/36
2001:db8:6000::/36
2001:db8:7000::/36
2001:db8:8000::/36
2001:db8:9000::/36
2001:db8:a000::/36
2001:db8:b000::/36
2001:db8:c000::/36
2001:db8:d000::/36
2001:db8:e000::/36
2001:db8:f000::/36
[b] As a small end site, you received the 2001:db8:c001:ba00::/56 assignment from your ISP, and you have 3 main office locations you want to divide this block between. Find these 3 subnets.
-
Number of subnets required = 3
-
Subnetting bits (x) such that (2^x) >=3 , x = 2 (this will actually give us 4 subnets of equal prefix length). Also the prefix length of our subnets will be 58 (56+2)
-
Number of hexits represented by 2 bits = 1
-
From the table, the defining hexit should increment by 4 with discrete hex values 0, 4, 8, c.
-
Thus our subnets are:
2001:db8:c001:ba00::/58
2001:db8:c001:ba40::/58
2001:db8:c001:ba80::/58
2001:db8:c001:bac0::/58

